Saturday, July 7, 2012

Sollux Horns - Casting on Porcelain

It's been a while since I've worked on these!  The reason being that my basement is being torn up, and I have to do all of my ceramic work there since it's so messy.  I took a day and managed to make a work space for myself though, so here goes!


Supplies!  I have a ton of Ultra Chic porcelain slip left over from my individual study in college, so I'm going to use what I have lying around.  Other than that I have a strainer, an old coffee pot to pour with, and a mold!  I have to strain the porcelain before using it to make sure it pours smoothly.


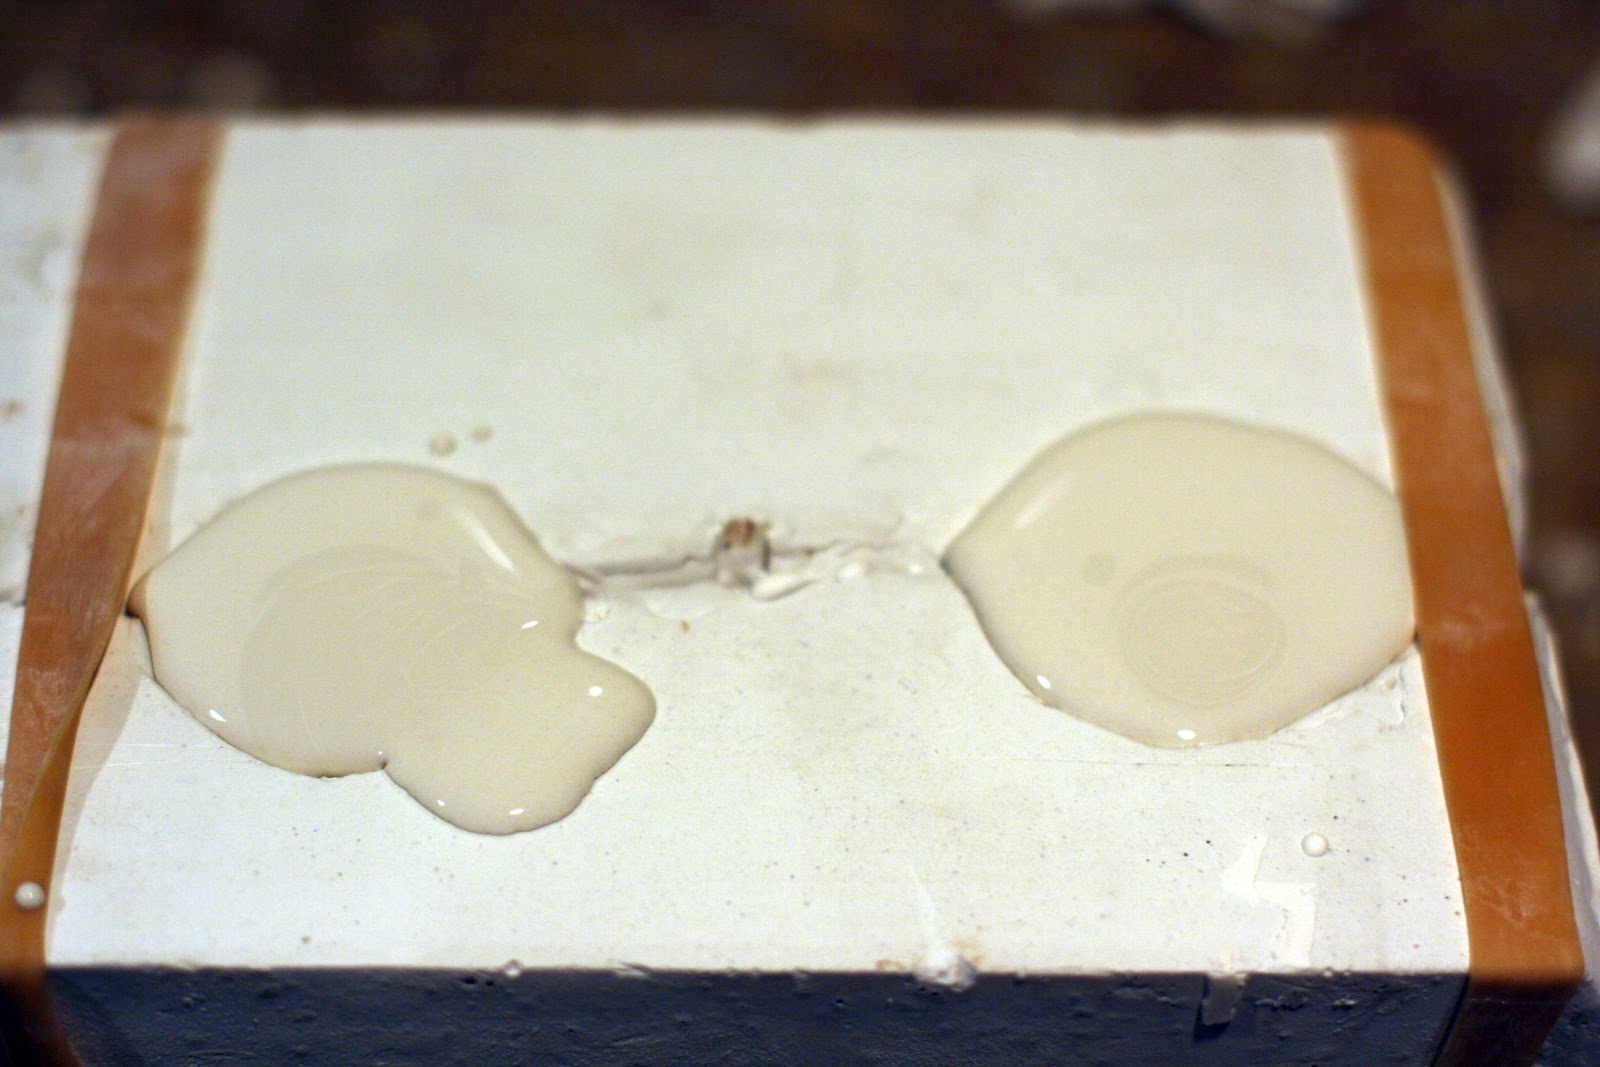
All poured into the mold!  My mold is all dry right now so it's going to cast pretty quickly.  So that I can gauge when I need to pour the excess porcelain slip out I poured some on top.  Once that little extra bit on top is dry I can pour the liquid center out.


Letting the porcelain drip out!  I didn't think about it when making the mold, but it's a little awkward to cast both horns at once since they're spaced just so that they won't pour back into the slip jar.


After they're all poured out here I have a shell of slip inside my mold, woo!


After giving it some time for the porcelain to harden a little more in the mold I pull it apart.  You know it's time to pull the mold apart either when it come apart without any pulling, or the porcelain starts to pull away from the edges. The porcelain shrinks a little as it dries.


Carefully pull it out of the mold.  Be gentle, porcelain is very fragile before firing!


Cut off the pour hole, it's junk.


Lastly you clean up the seam lines a little, I drilled some holes so that I would have something to firmly attach them with.  Firing comes next!  I'm waiting until I have a few pairs to fire so that I'll have extras, and that may take another week or so since I have to wait until the mold is dry enough for me to cast more.

Friday, July 6, 2012

Painting Flutteryshy Part 2

Sorry for the delay, I've been updating my website.  It has info on commissioning me, I hope you'll consider visiting it! :)  ANGEL ADDICTION.


Finishing up the eye shading.


Adding shines in the eyes!

 
Cleaning it up a little bit.


Pink tear ducts.


Eyelashes.


Pastel shading the eyelashes a little.


Eyebrows.


More pastel shading.


A little more shading and done!


Now I don't have a yellow body for her!  I'll have to sacrifice one and airbrush it.

Wednesday, July 4, 2012

Fluttershy Part 1

I've had an idea floating around in my head for a while, I love My Little Pony (I like a lot of cartoons) and decided a while ago that Monster High would work well for making the characters.  Since Monster High girls come in so many different skin tones it would be easy(ish)!

When I saw the Bee Create-a-Monster kit at Toys R Us the other day I had to get it because it had yellow skin, and my favorite pony is Fluttershy :)

So here's progress photos of painting her!


White highlights.


Really soft pink blush.


Whites of the eyes.

Eyeliner.


The irises.


Pupils and darkest shadows.


A bit of white highlights.


Darker blending.


Almost done with the eyes, the rest tomorrow! :)

Tuesday, July 3, 2012

Just heads

This is my current lineup of heads needing to be worked on!


From left to right, Skull girl, Bee girl, Cupid, Operetta, 3 Eyed girl.  I'm getting ready to reroot Operetta :)

Monday, July 2, 2012

A different kind of doll

When I was out at Toys R Us shopping from some Monster High dolls (I totally scored, they had a great selection!) I grabbed a different kind of doll.  They were in the same display as the Monster High dolls and I reached for one before I even realized it was something different.  They're called Bratzillaz and appear to be a reaction to the popularity of Monster High.

They have pretty similar looks and sizes, but different proportions.  I decided to get one when I noticed that they have actual eyes, not painted ones.  I couldn't find a lot of information about them online, but what I did find said that they have glass eyes, THIS IS NOT TRUE.  So be warned if you're going to paint one, you're going to have to remove the eyes before you can wipe the face because acetone will melt the acrylic eyes.  I grabbed one named Cloetta Spelletta, her two different eyes attracted me.


The eyes are difficult to remove, but I read that heating the head up helps.  I had to squeeze the head really hard and pry them out with a knitting needle.  They can't be removed from inside the head, there's a socket for them to fit into through the eye openings.  This is problematic.


All wrapped up and highlights added!  You can see the head is really different looking from any of the Monster High girls, with make up they looked more similar.


Pink blush.


Smoky eyeshadow.


Eyelashes painted.


Pastel work, I outlined the lips, filled in the eyelid creases, and marked where the eyebrows go.  This was where I noticed how smooth the vinyl is, it's closer to working on resin than the Monster High dolls.  It's really not tacky at all on its own, a very stiff vinyl.


Detail work on the eyebrows.


Eyeliner and a little more pastels.


Teeth!


Sealing and gloss!  Unfortunately this means the next step is to insert the eyes.  This is difficult when you don't want to damage the face up.  I can only recommend a few things since I had a lot of trouble.  One, trim off the little pegs on the backs of the eyes, I could not get them to work otherwise.  Two, do it when the head is still 'fresh' from the face up, before the sealant gets too dry and stiff.  Three, try using some smooth pliers, not to grip the eyes, but to help get the vinyl over the edges of the eyes so they can sink into the eye sockets.

Other than that, I have no more suggestions other than to use different eyes.  If you buy some oval glass eyes they should have more rounded edge and should be easier to push in without getting caught or damaging the paint.


Finished!  She's not my favorite, I don't think I would purchase another.  The head is pretty cute, in a very stylized way, and having sockets for real eyes is neat, but the body is not well proportioned at all.  It's clear they were trying to emulate Monster High dolls, but they sort of missed the mark a little.  Plus, the hands are really horribly sculpted, they're just flat mitten hands.