I don't specify how I made the wefts in the tutorial, but it's basically the same way as this, the only difference is that I sew them onto tracing paper and tear them off instead of tulle.
I used some cheap braiding hair because I needed six different colors, but only a little bit of each color, so I wanted to save some money. You can buy it for $3.55 a pack at Doctored Locks, they have a low price guarantee and a huge selection of colors, so I like buying from them :) Or if you have some more money to burn feel free to buy wefts pre made somewhere like Cool Cat, they have a huge selection of doll hair wefts. If you're looking to just make a junky practice wig I recommend buying a cheap weave from a beauty supply store in your area, they come as cheap as $8 in my experience, and are good if you don't want to waste money on more expensive hair just for practice!
On to the tutorial!

-Scissors, sharp enough to cut hair
-Hair wefts
-Plastic bag
-Stretchy, thin fabric for the wig cap
-Brush or comb, to deal with the hair
-Hot glue gun (not shown)
-Needle and thread, or sewing machine (not shown)
See the rest after the cut!

Please make sure to cover your doll first! You don't want to damage it at all or get little snips of hair everywhere. You can cover the entire doll with a big bag, or just the head, it's up to you.

Cut a half circle out of your fabric. I used some ribbed jersey fabric that I got in the bargain bin at a fabric store, it works nicely and hot glue sticks to it well. It has some good stretch and is thin enough not to add bulk to the wig. There are only two measurements you need to keep in mind when cutting: circumference of the head, and the distance from the top of the ear to the middle of the top of the head. Those two measurements effect how long the flat side is, and how high the hump you cut is. (I hope that makes sense?)

Sew the two pieces together, I used a machine but there's no reason you can't do it by hand!

Check the fit on the head. You want it snug enough to fit tightly, but not so tight that it wants to slide off the head. If it's a little bit off it's ok, the whole thing is going to get covered in hair anyways :)

I just use a cheap low head hot glue gun, it works great! Let it heat up and get ready to apply some wefts.

Start in the back, since this is where the ends of the wefts will meet, it shouldn't end up too messy, but you still don't want it to show in the front.

Just start with a little dot of glue to attach the first end of the weft.

Once one end is attached start working your way around the edges. I work it around an inch at a time so the glue doesn't cool before I have a chance to attach the hair. I gently press the hair into the glue with my fingers until I can feel it squeeze through the hair. You don't need a whole lot of glue for this, just enough to make sure it's secure!
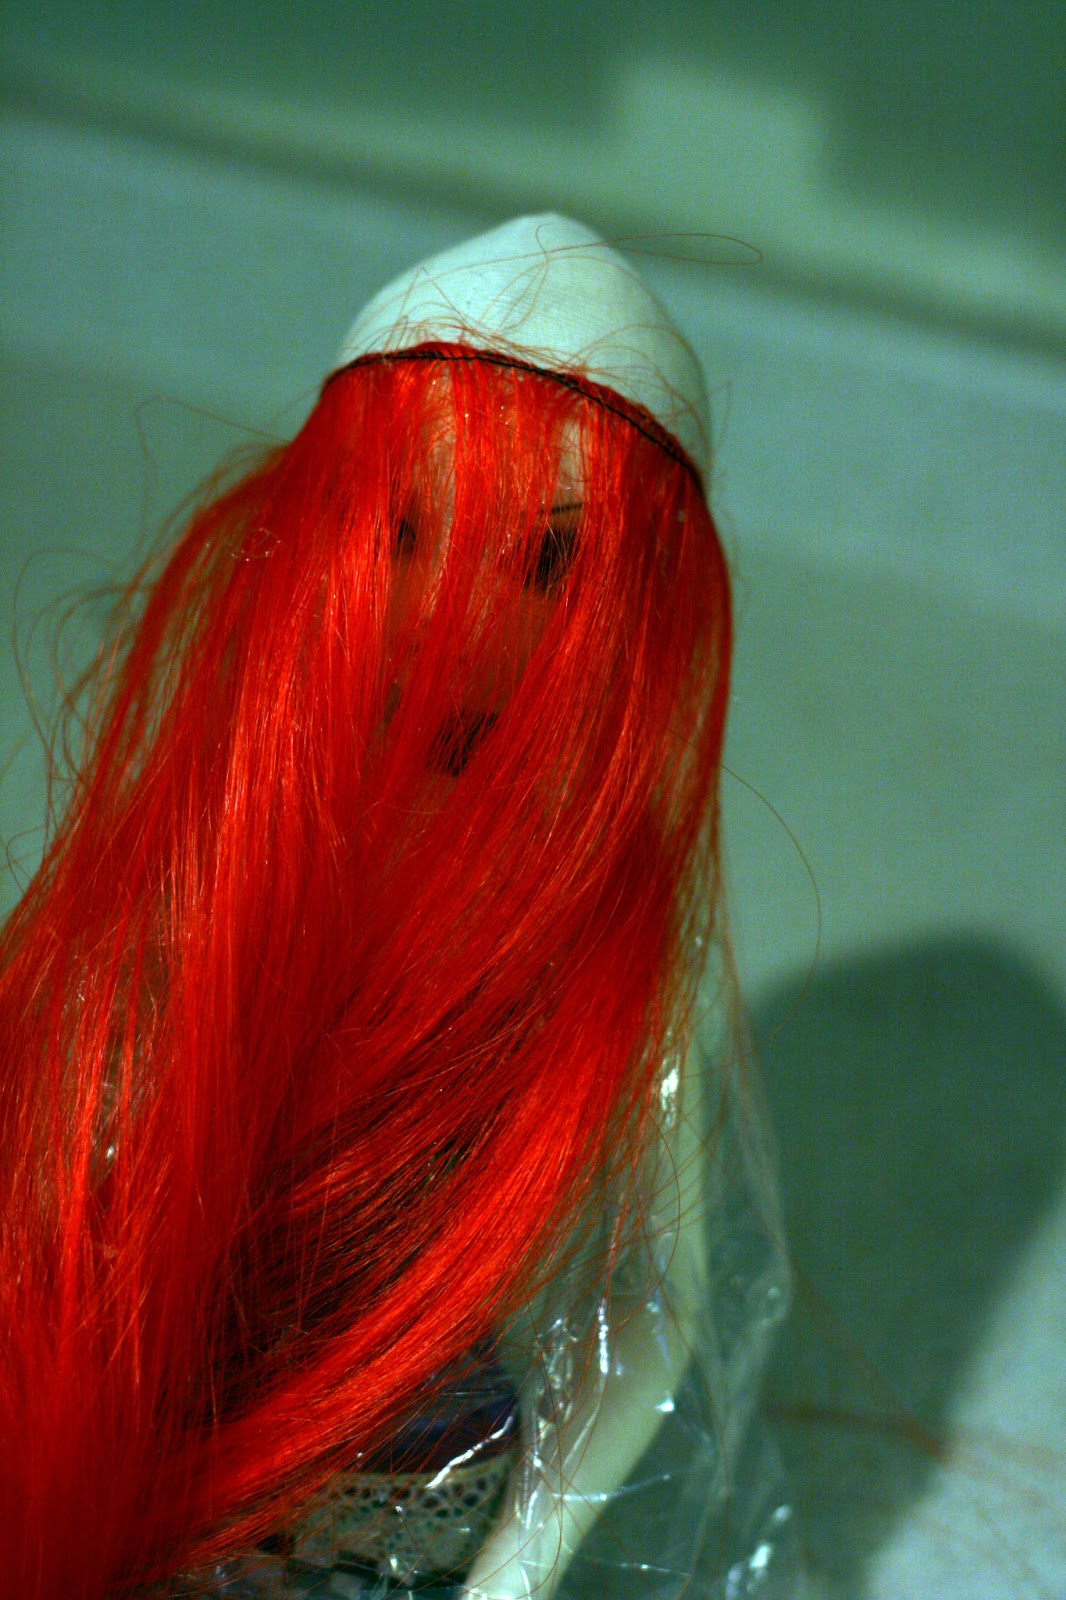
Here's how it looks once the first ring of hair is attached! The whole doll is going to be covered up as you add hair, so say goodbye to their face for a while.

Since you want the part of the hair to end at the top of the head, not the center of the wig cap, you have to add some extra wefts to the back. Just add one row around the back, starting from above one ear and around to the other. Only do this on the back side of the head!

Purple all the way around! For the rainbow effect I change colors with every ring. With six colors it ends up just about perfect!

I put one extra row in the back between every ring.

Blue! So that you can keep your bearings on where the part should end up poke at the doll's face and feel for their nose. It will give you an idea of where the part needs to be on the head.

Working my way up to the top! Every ring gets a little smaller.

In a lapse of my better judgement I used yellow for the top color. Darker hair colors cover better, and since I was lazy I made all my wefts with black thread. Because of this the thread is just slightly visible underneath the hair on top.

I did two rings of yellow, to close up the remaining space and to make sure there was enough yellow. Since the rings are so small they use less weft and less hair.

To finish up take a few inches of your top color weft and the glue gun.

The point is to roll the weft up into a little spiral, using glue to keep it rolled up.

All rolled up!

Use a big blob of glue to glue it to the head! It looks silly now but we're going to get it looking right in just a minute.

Loosely spread the hair around the head so that it covers the visible wefts. As long as you used enough hair it should cover.

Wet the hair.

Cover it with a wet cloth and smooth all the hair down.
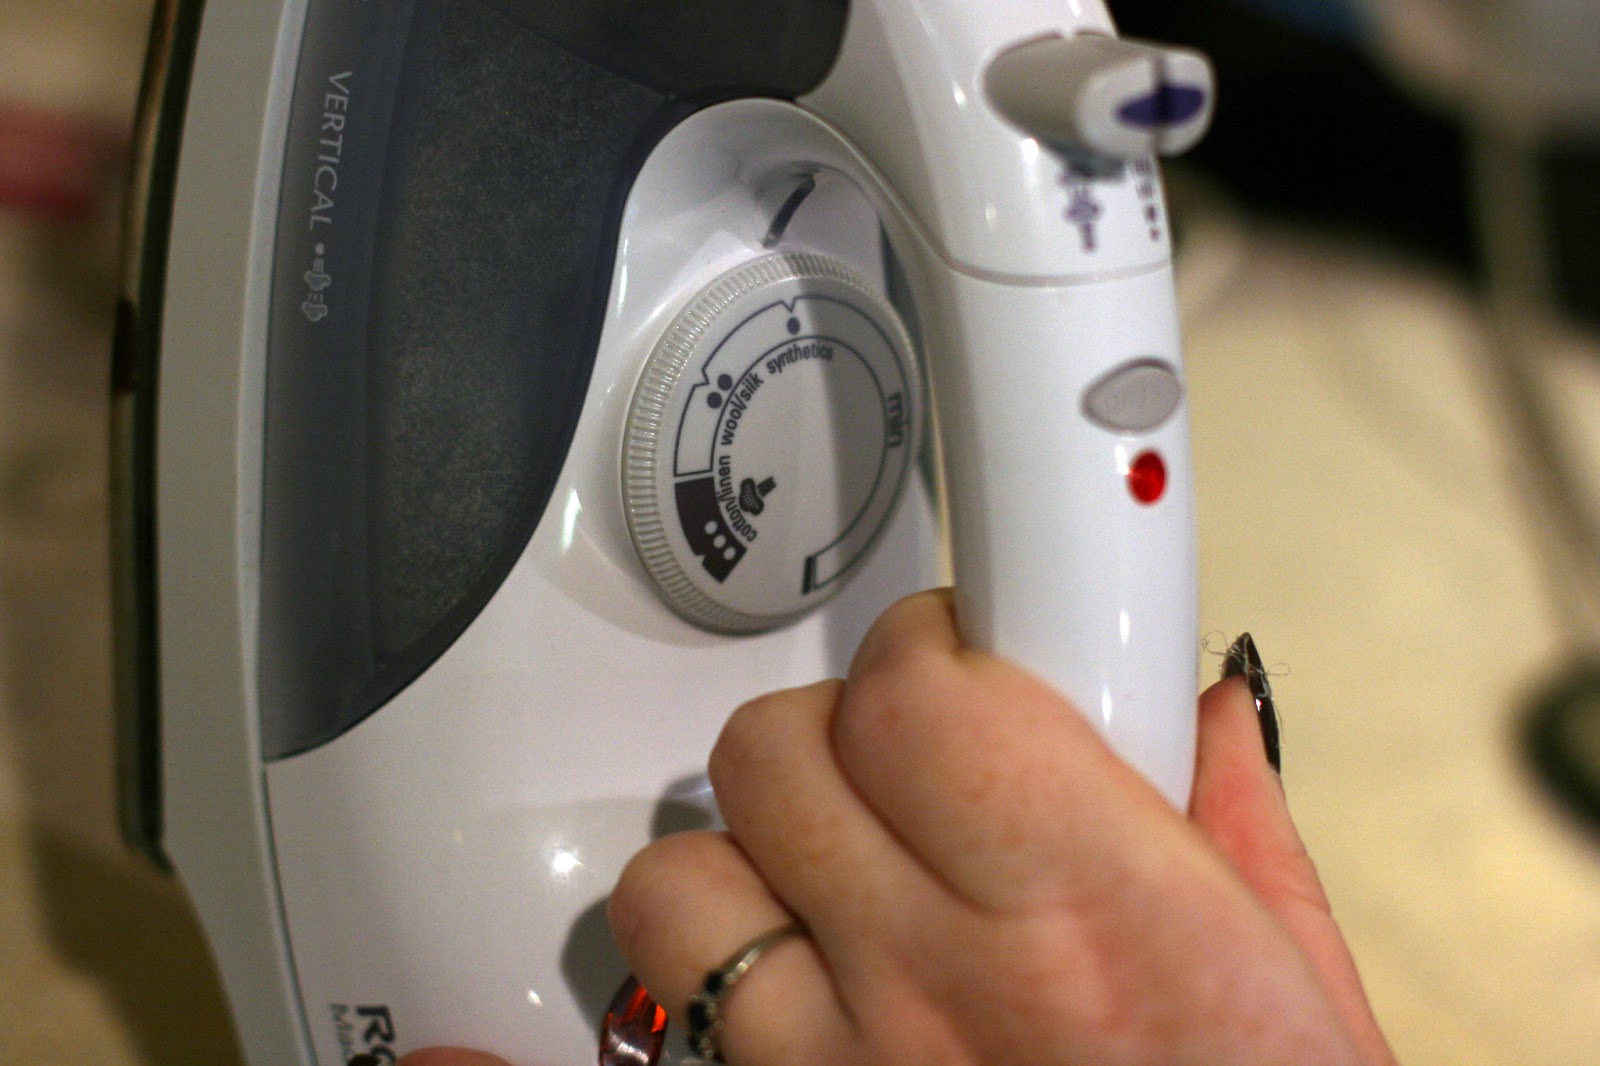
Set your iron to low, I used the 'synthetic' setting. You don't want it too hot or you'll melt the hair or damage your doll.

Gently press the iron over the top of the head. You should hear a little 'sizzle' and see some steam, if the sizzling stops then move the iron around until you've pressed all around the top of the head.

Lift the fabric off and check how the hair looks. Much flatter, right!

All that's left now is a little bit of styling... Since right now I have rainbow Cousin It.

I don't know the first thing about hairdressing, so all I can say is go slow if you're worried! Only cut off a little bit at a time, and cut upwards. Blunt cuts look bad, so try to avoid them.

I parted the hair so I could see where her face was, it helped me know where else to cut.

All trimmed up with bangs! The rainbow effect is pretty apparent, but you can also try cutting 'layers' to accentuate the different colors. All this means is that the longest hairs are the ones on the bottom ring (for this wig, red), and work your way up until the shortest would be at the top (yellow). If you try cutting it that way it's easy to see every single color!

All the hair I cut off! Be careful with it on the floor, it's really slippery if you step on it x)

And all done!
can you brush this to keep straight and also what type of hair is this
ReplyDeleteThere is a link to the type of hair I used in the article :)
DeleteThank you for this great tutorial! I'm definitely going to use it!:)
ReplyDeleteThanks for this! :)
ReplyDeleteI'll add your blog to my favs here is a lot of useful stuff! :)
Thats a really awesome wig thanks for the tutorial.
ReplyDeleteCan this style of wig be styled however you want without the wefts showing? I'm trying to make a wig for a cloth doll that my daughter can style in braids, updos etc without it looking like a wig. I really want it to look like it's real hair
ReplyDelete